Scalable Container Orchestration Without Kubernetes

Organizations want to deploy and orchestrate container workloads without having to hire an entire team to manage them. Sure, engineers will always need to ensure that the clusters, environment, and code are running as effectively as possible, but they shouldn't have to sit and babysit a Kubernetes cluster.
In this blog post, I break down one method of container orchestration with Azure Container Apps.
Prerequisites
To follow along from a hands-on perspective, you'll need an Azure account. If you don't have an Azure account, that's totally fine! You can still follow along to understand how Azure Container Apps works.
Why Azure Container Apps
Azure Container Apps (ACA) is a great middle ground between App Services and Azure Kubernetes Service (AKS). The goal of it is to give you a scalable method of orchestrating containers that performs well without having to implement Kubernetes.
ACA uses AKS underneath the hood, so it's still doing the "Kubernetes thing" without you having to manage the Kubernetes thing.
As with all Azure services, it integrates well with other portions of Azure that you may want to incorporate like Entra for authentication and authorization. As far as deploying workloads with ACA, you can use the Azure portal, the Azure CLI, Azure Bicep, and Terraform - which means you have plenty of repeatable processes that you can implement with the tools/platforms you're already using.
Aside from the implementation methods and abstraction that were highlighted above, the "scale to zero" option is something that certainly differentiates ACA. Scale to 0 gives you the ability to scale replicas down when they aren't being used which is great for cost optimization, and that's very important to the enterprise.
ACA is a great option if you want to move away from heavier orchestration platforms, but still need the performance and scalability of a big orchestration platform.
ACA Cons
As with any service, product, tool, or just about anything in tech, there are cons. No service or implementation is perfect, and it's important to understand where things may not work entirely for you.
- Lock-in: With ACA, you're losing a fair amount of customization. For example, you can use Ingress, but you can't choose the Ingress Controller you use.
- Not a lot of metrics are available.
- Security features that you may want like SecurityContexts aren't available.
You're giving up control for abstraction.
Deploying Container Apps From The Azure UI
Now that you know a bit about ACA and why you may want to use it, let's break down a few key methods for deploying workloads to and with ACA. You'll first see how to deploy a container and then you'll see how to deploy to ACA right from source code.
Container Deployment
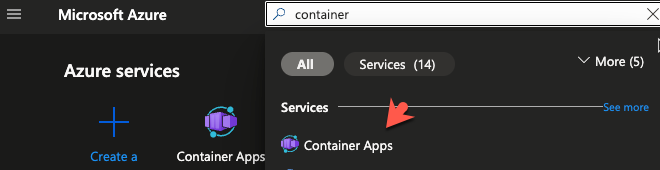
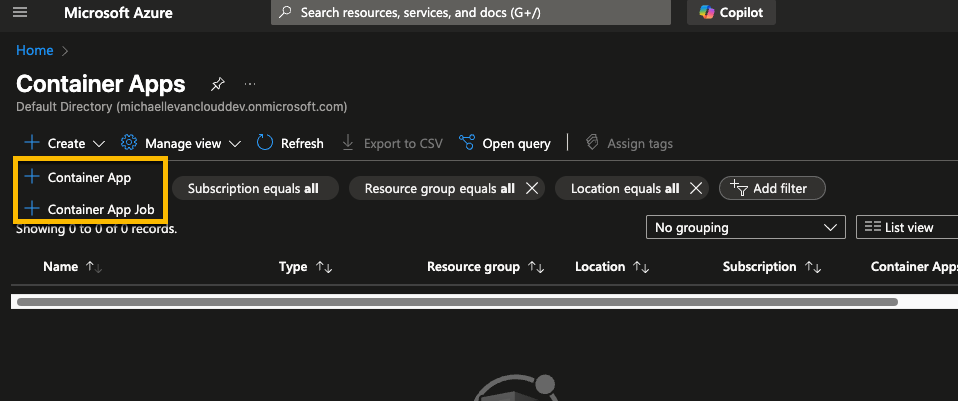
- Log into the Azure portal and search for Container Apps.
- Click the + Create button and then choose the + Container App option.
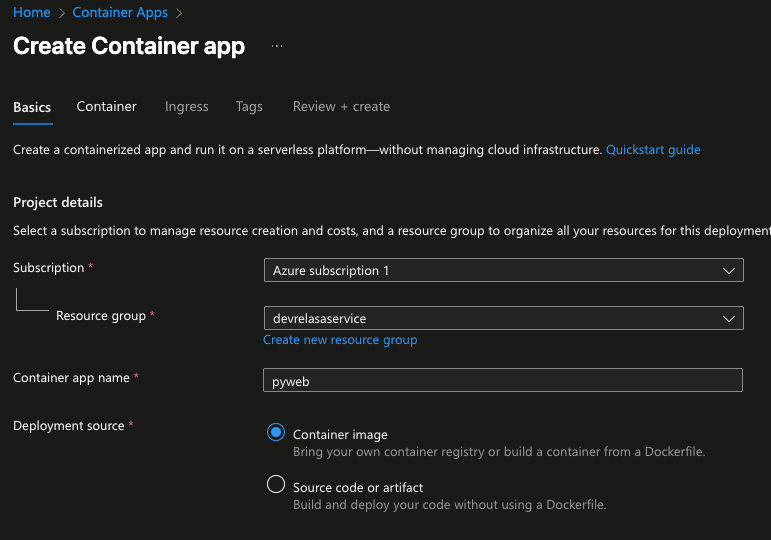
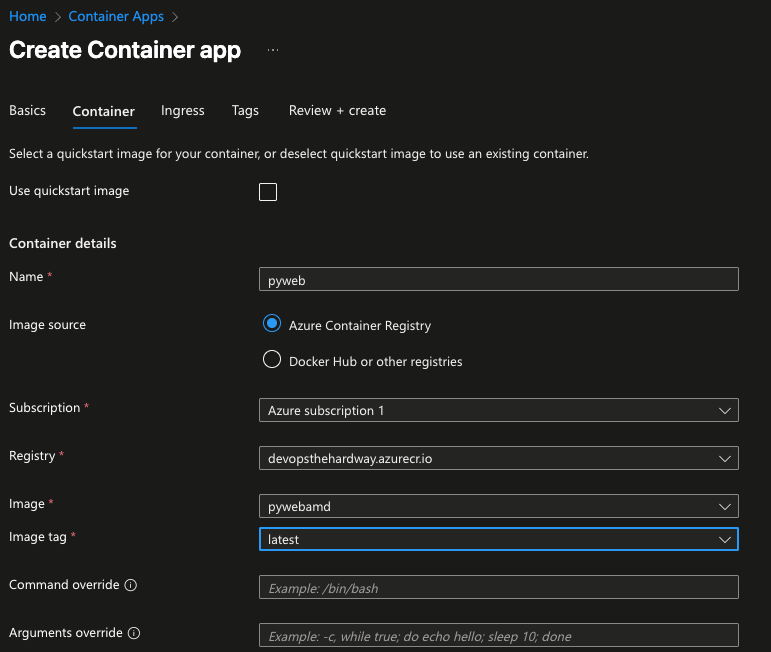
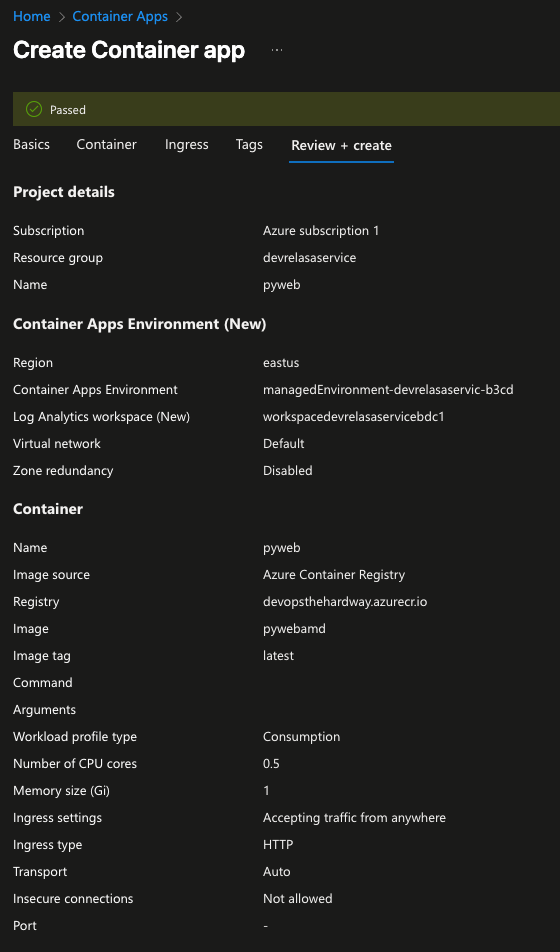
- Input your subscription name and resource group along with an app name of your choosing. You'll also need to choose Container image for the Deployment Source.
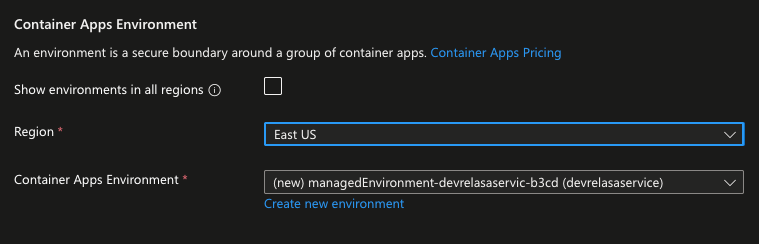
- Create a new ACA environment (it's where ACA runs, you don't have to manage it) and the region where you want the environment to be deployed to.
- Input the information about your container including where it's getting deployed from, the name, and the image/tag itself.
If you don't have a container image readily available, you can choose the Use quickstart image option.
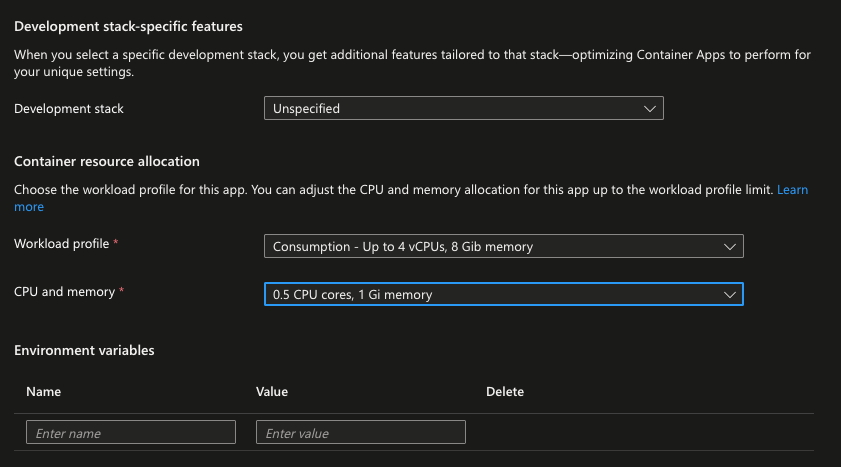
- Within the Container resource allocation section, you can choose the amount of CPU and memory your application needs.
- You can also enable ingress to ensure that the traffic to your application is secure.

- Once ready, click the Create button.
In the next section, you'll learn how to deploy source code to ACA.
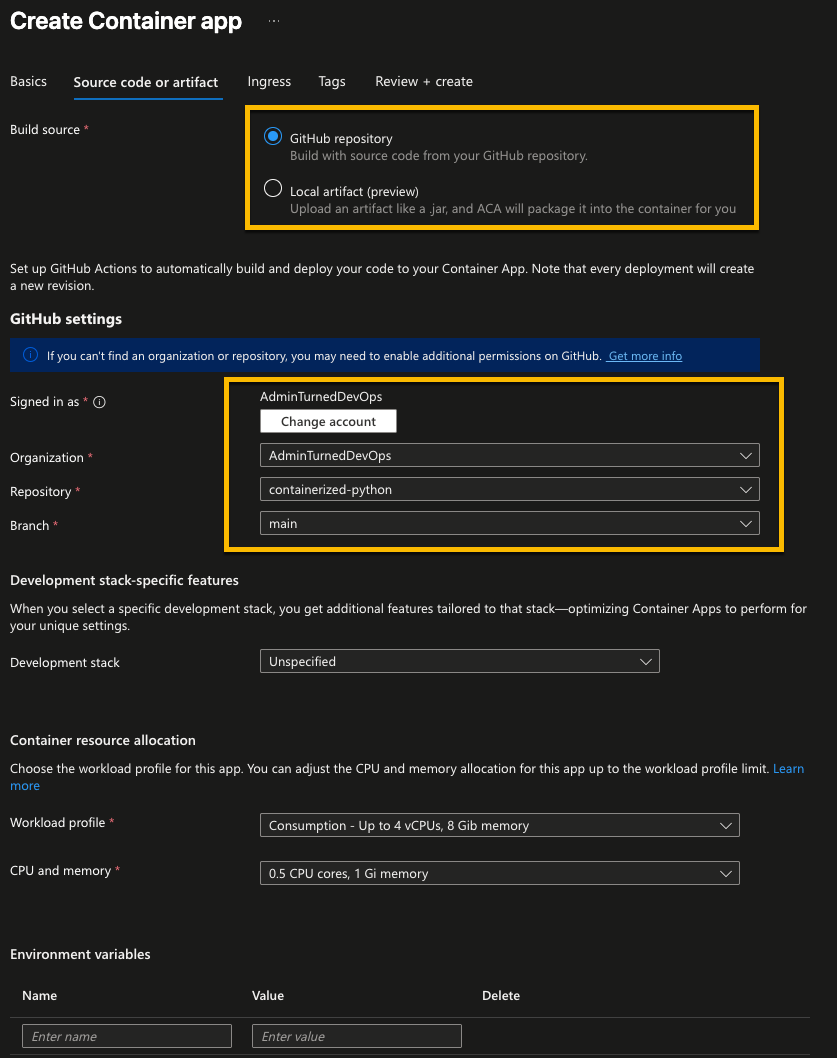
Code Deployment
Luckily with the Code Deployment option, it's not much different in terms of the options you'll select other than the Deployment source.
- Within Deployment source, choose Source code or artifact.
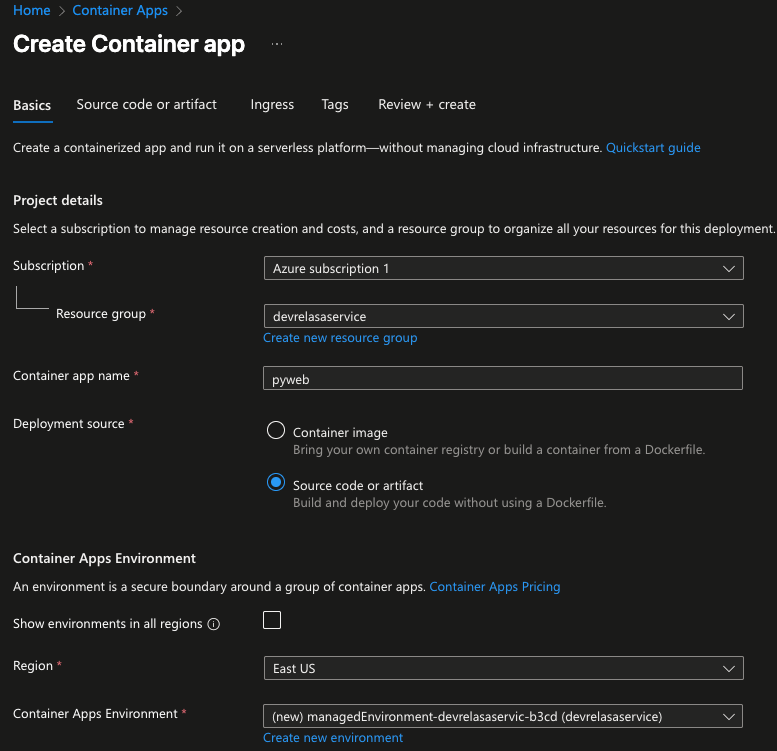
- Specify your Git org, repo, and branch. You can also choose to upload an artifact which is a preview feature in ACA.
Congrats! You've successfully learned how to deploy to ACA manually. In the next section, you'll learn how to do the same, but programmatically.
Programmatically Deploy To ACA
In the previous section, you learned from a graphical perspective how to deploy to ACA. In this section, you'll learn how to deploy in a programmatic and repeatable fashion with the Azure CLI and Terraform.
Azure CLI
- Add the
containerappextension.
az extension add --name containerapp --upgrade- Register the
Microsoft.Appprovider.
az provider register --namespace Microsoft.App- Register the
Microsoft.OperationalInsightsprovider.
az provider register --namespace Microsoft.OperationalInsights- Create the container app with your specified metadata.
az containerapp up --name pyweb \
--resource-group devrelasaservice \
--location eastus \
--environment 'my-container-apps' \
--image pyweb:latest \
--target-port 80 \
--ingress external
Luckily, the AZ CLI method is quite quick!
Terraform Config
If you need another form of automation that may align more with how you're deploying workloads in production, you can use Terraform.
- Create a new resource for log analytics.
resource "azurerm_log_analytics_workspace" "log-deploy" {
  name                = var.logAnalyticsName
  location            = var.region
  resource_group_name = var.rg
  sku                 = "PerGB2018"
  retention_in_days   = 30
}- Create the ACA Environment.
resource "azurerm_container_app_environment" "test-deploy" {
  name                       = var.envName
  location                   = var.region
  resource_group_name        = var.rg
  log_analytics_workspace_id = var.logAnalyticsId
}- Create the container app itself. Ensure that you specify the right metadata (container image, name, etc.).
resource "azurerm_container_app" "test-deploy" {
  name                         = var.appName
  container_app_environment_id =azurerm_container_app_environment.example.id
  resource_group_name          = var.rg
  revision_mode                = "Single"

  template {
    container {
      name   = "nginxcontainerapp"
      image  = "nginxt:latest"
      cpu    = 0.25
      memory = "0.5Gi"
    }
  }
}
To make the Terraform process as efficient as possible, you should use a variables.tf file. That way, you aren't hard coding the values into the main.tf.


Comments ()